Deadwood, South Dakota

I mentioned on Friday our family had a planned one day road trip on Saturday. With the snow and bitter cold, I knew we would probably not be able to visit Theodore Roosevelt National Park. When we came out in September, we stopped at the top of Painted Canyon for pictures and saw some of the wild bison. We've been wanting to go back and see them in the snow, but dealing with a -40 degree windchill makes the phrase  "when you've seen one buffalo, you've seen them all," all too real.


Living in the southeastern corner of a state where everything that is educational or fun is about four hours away and trying to decide where to go and face the frigid weather and seasonal closings can be a little discouraging. My husband mentioned visiting Spearfish Canyon in Spearfish, South Dakota on Friday when he came in from work; a fellow co-worker told him about it. I did a little internet research and found that Spearfish is not too far from Deadwood, South Dakota. Yep, the real Deadwood where Wild Bill Hickok was killed.  We were able to see both places.

Of course, Deadwood is like many tourist towns through out the area where many of the establishments close for the winter. There are somethings that a family can enjoy even in the off season, but not much. Deadwood is known for its bars and casinos, but if you look over that, a history loving family can spend the day there and experience what life would have been like in the 1870/1880's. HERE is a link to the attractions that are offered in Deadwood.

I fall in the categories of Wild West History and Westward Expansion lover; I even have a soft spot for gunslingers. I know, crazy! My husband has helped feed my addiction  over the years by stopping off in St. Joseph, Missouri, Sundance, Wyoming, Little Big Horn, Boot Hill in Billings, Montana (local history) and Garnet, Montana. Of course, my list of planned trips are in the works now that we back in Montana.

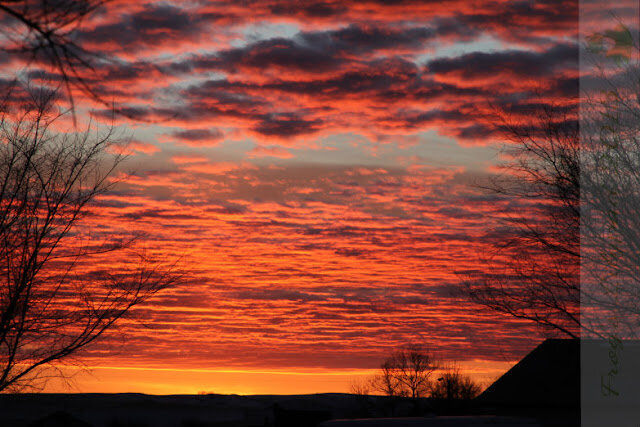
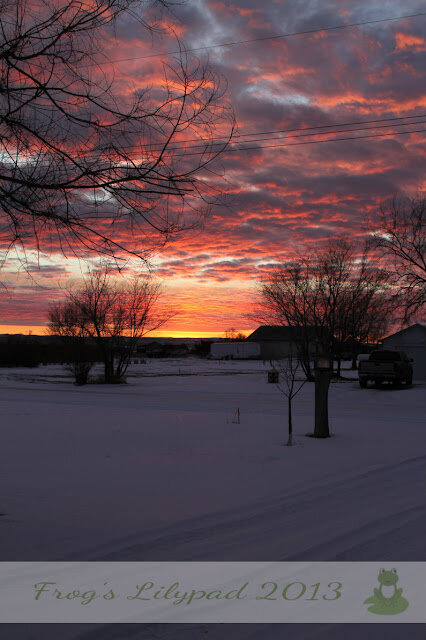
Deadwood is nestled in the Black Hills. The area is beautiful! Oh, the snow on the hillside makes the scenery just mind blowing.

Deadwood was a mining town during the 1870's Black Hills gold rush. Being a gold mining town, there was wildness that lived here. Sadly, the first pioneer preacher to the area, Henry Weston Smith was murdered  on the hill right outside of Deadwood. There are two speculations as to who did the horrible deed; Indians and miners. The Mount Moriah Cemetary information leans towards the murder being committed by Indians.


The most memorable act that happened in Deadwood, was the murder of Wild Bill Hickok. History tells that anytime, Hickok entered the saloon he sat at a poker table beside a huge fireplace with his back against the wall. On August 2, 1876, when he sat down at the table, he sat with his back towards the door; leaving him in a vulnerable position.


The original site does not house the items any longer. They have moved them across the street to a larger building which is a real bar and casino. During the day, the gaming establishments are open to families since so many of them are full of museum artifacts, like this one.


This is the chair Wild Bill was sitting in when he was shot.


These are some original photos and drawings of Wild Bill.


Wild Bill and Calamity Jane are buried beside each other in Mt. Moriah Cemetery. Jane's grave is the one with yellow and red flowers.


The cemetery is beautiful, it is located on a hillside looking down on the city; it is definitely rough terrain.

One thing that really stood out to me about this resting place are the walk ways. Each one that we saw were named after people or places from the Bible.


If you know anything about Wild Bill and Calamity Jane, then you know "wild" is perfect for Bill. As for Jane well, she was no Dale Evans.

If you are a history loving family, you really don't want to miss Deadwood, South Dakota. Just remember they are a casino and bar tourist site.

I'll post about Spearfish Canyon later this week. I'm spending time with my sweet husband since he has today off from work.

Here One Minute Gone the Next

Where has the week gone? Really, I mean yesterday was just Monday;  I can't believe how the time has flown.  It's a little hard to believe that we are already on the 18th day of 2013.  I think life could slow down just a bit.


I've been busily working on a baby gift. My second cousin has a new baby boy and the sweater I was working on just didn't come together as I had planned, so I knitted the cutest hat and I'm working on a pair of booties. Hopefully, they will be finished this evening, so I can take a quick picture and then pack them up and mail them off.

Living in Montana, you learn rather quickly the weather here is not like it is back home. It can make a sudden change right before your eyes, literally. At the first of the week it was below zero and snow blowing like there was no tomorrow. On Tuesday, it looked like a blizzard blowing outside the window one minute and the next, the sun was out and the temperature began to rise.Wednesday the sun  came out and the temperature began rising just above freezing. This happened on Thursday also with the thermometer dancing right about 35 degrees. With warmer temperatures during the day and with little cloud cover at night, the temperatures have stayed kind of warm~ what we would call warm.  Well, today is quite the rebel when it comes to winter weather! It is absolutely beautiful! The thermometer quickly rose above the forecasted 41 and it's reading 60 degrees at the moment. Just a little taste of spring.

This is our first week studying the American Revolutionary War. We touched on six things that led up to the War for Independence; the Proclamation of 1763, the Navigation Acts, the Sugar Act, the Quartering Act, the Stamp Act and the Towshend Acts. I can't help but wonder what the men and women who bravely fought for the freedom of our country would think, if they could see it now.  Yes, I did say women. The  men who bravely put their lives on the line had women standing behind them, supporting the cause.

I've been trying new recipes this week. Two were very yummy but not pretty to look at, one was a childhood favorite. Today, I'm cooking a favorite ~ Taco Soup.

Since my husband has off on Monday, we are making plans on something fun. But, with the weather, our plans are for tomorrow. With the previous snow and all I'm keeping it a secret until I know for a fact that we are going to able to visit. If not, we have a couple of  backup plans.

We have some of the most beautiful sunrises and sunsets here in southeastern Montana.  We may not have the Rocky Mountains, but our sunsets blow the mountain views out of the water. I took these pictures on Tuesday night.


Rich's Bakeshop Coconut Cake

Rich's was an Atlanta icon. Their bakeshop was just as famous for their baked goods. Oh my! The Rich's Bakeshop Coconut Cake was out of this world.

Rich's Bakeshop Coconut Cake

Atlanta, Georgia was home to the Rich's Department Stores for almost 140 years. I remember shopping at Rich's at the local mall near our house; we were a family who lived strictly on a budget, so shopping at Rich's meant shopping their budget shop. This was a designated floor in the stores that  held last season's clothes and items that were slightly damaged as in picks in the fabric and missing buttons.

 When I was a little girl, my Grandmother took my sister and I to the big downtown store. This was our first real experience with "downtown" shopping.  My Grandmother even bought us our first real ladies upper garment undies. It was an elastic tubed contraption that neither one of us had anything to fill it with. But hey, we were proud of owning our first ever strapless unmentionable.  

While we were there, my grandparents treated us to lunch in the cafeteria that had a sky high (at least we thought) view of the Atlanta area. If I remember correctly my Mother was not too thrilled about us coming home with our bag of items. Our last trip to the wonderful downtown location before they closed that store in the mid 1990's was with my Grandmother. This time, my Mom made sure she came along on this trip, I guess she thought she could stop the purchase of things we really did not need. Truthfully, she came so she could drive and do her last shopping there also. (Hi, Mom!, I know you're reading this.)

Rich's Bakeshop Coconut Cake

Rich's was known for their bakeshop. The bakeshop was in the Atlanta store (when the Atlanta store closed, so did the bakeshop) and they sent out their cakes, cookies, etc. to the smaller stores that had a bakeshop sell counter.  Everyone bought their cakes and other favorite sugary items from Rich's. Wedding cakes, birthday cakes, you name it, they made it and people all round bought it. Some of the memories I have of the bakeshop goodies are the lemony smiley face cookies I took to school in kindergarten for my birthday.  The chocolate cake that everyone in our family dearly loved and was bought for our birthdays. Then there was the famous Rich's Bakeshop Coconut Cake.

When I was little a girl, I was not too fond of coconut. It was not until I was a teenager at a wedding shower when I had my first coconut encounter where I truly loved it. From then on, anytime I had a chance to eat the famous cake, I made sure I had my share.

Several weeks before Christmas, I was in the mood for coconut cake. Not just any coconut cake, but for the real thing ~ Rich's Bakeshop Coconut Cake. I knew there had to be something on the internet about this recipe, I mean even the Neiman Marcus chocolate chip cookie recipe is floating around, so why not the coconut cake. Within 2 page searches, I found exactly what I was looking for. I will tell you that it is extremely easy to make and it tastes OUT OF THIS WORLD! I recently found the Atlanta Journal and Constitution removed the link to the recipe. But, it was originally shared in the 2007 Easter Sunday edition.

Rich's Bakeshop Coconut Cake

                   Rich's Bakeshop Coconut Cake

Ingredients:

  • 2 1/4 cups cake flour  or all purpose flour

  • 1 teaspoon salt

  • 1 tablespoon baking powder

  • 1 tablespoon powdered milk

  • 1/2 cup water

  • 2/3 cup liquid milk 

  • 3/4 cup vegetable shortening

  • 1 1/4 cups granulated sugar

  • 3 large eggs

Preheat oven to 350 degrees.

Prepare cake pans by lightly greasing with shortening, then dusting with flour.

In a large bowl, mix the flour, salt and baking powder. Set aside. In a small bowl or measuring cup, stir the powdered milk into the water and mix until dissolved. Combine the liquid milk with the powdered milk mixture and set aside. 

In mixing bowl, cream together the shortening and the sugar until fluffy. Add the eggs, one at a time, beating well. Add half the flour, beating until just incorporated, and then half the milk, again beating until just incorporated. Repeat this step, adding the remaining flour with the remaining liquid, and beat until just smooth (about 1 minute). Be sure to scrape down the sides of the bowl during the mixing. Pour the batter into the prepared cake pans and bake for about 20 to 30 minutes. The cooking time will vary depending on how many cake pans you use and how full they are. The cake is done when it springs back when lightly pressed near the center with your finger. Allow the cake to cool for a few minutes in the pan, and then turn out onto cooling racks to cool completely. 

While the cake is baking work on the icing and filling.

ICING:

  • 1/2 cup vegetable shortening

  • 1 teaspoon vanilla

  • 1 teaspoon salt

  • 1 pound confectioners' sugar

  • 2 tablespoons powdered milk

  • 1/2 cup water 

TO MAKE ICING:

In a mixing bowl, combine the vegetable shortening, vanilla and salt and cream together until incorporated. Slowly add the confectioners' sugar until it forms a very thick consistency. Dissolve the powdered milk in the water and gradually add, just 1 or 2 tablespoons at a time, until the icing is a nice, spreadable consistency.

COCONUT FILLING:

  • 2 pounds shredded coconut, divided

  • 2 tablespoons water

  • 2 tablespoons granulated sugar 

TO MAKE FILLING:

Make filling: In a large bowl, thaw the frozen coconut. Set aside. Take 1 1/2 cups of the coconut and place in a smaller bowl. Combine the water and sugar and pour over this smaller bowl of coconut. This should be very moist but not soupy.

TO ASSEMBLE:

Place one layer of the yellow cake on a cake plate and spread with icing. Spoon the moistened coconut over the icing. Place the next layer on top and spread with icing, spooning the moistened coconut over it. Continue this process until all your layers are filled; however, don't put the moist filling on the very top of the last layer, as it will be iced. Next, cover the entire cake with the icing. Make sure to use a thick coating of icing. Take handfuls of the dry, thawed coconut and press the flakes into the icing. You may want to put wax or parchment paper underneath to catch any coconut that falls. Continue pressing dry, flaky coconut all over the cake until it is completely covered. Chill for about 1 hour to set and then serve.

The Rich's Bakeshop Coconut Cake recipe is definitely a treasured find. I hope you all enjoy it.

Rich's Bakeshop Coconut Cake

Homemade Baking Powder

With the winter storm that came through yesterday, we knew our bi-weekly trip to Miles City needed to be taken early.  I always look forward to this trip so I can stop in at the Vincent de Paul thrift store. It's the only thrift store in Miles City and I really enjoy stopping in there. Since we had to make our trip during the week, I would not be able to stop in because they would be closed. I tell ya, I'll be ready to visit in 2 weeks!


I have quickly learned that the Miles City Walmart is HORRIBLE, HORRIBLE, HORRIBLE about keeping their shelves stocked throughout the day. Because of this, I have to either do without or use a different brand. While I was there on Wednesday, the flour section of the isle was totally bare of all the  flour.  I looked and found one bag of all purpose flour on the bottom shelf tucked behind a bag of corn meal. Anyone who knows me, knows I really dislike buying all purpose flour. I keep bread flour in the freezer for my breads, but all purpose flour and having to add salt, soda and baking powder is just a nuisance for me. Why not just use self rising, everything is already in there.  Of course, I grabbed the last bag of flour.

Earlier this week, I began researching baking powder on the internet. I have a cake I'm planning on making next week that calls for cake flour. I don't buy cake flour, so I knew I was going to have to use all purpose.  Since this cake is a childhood favorite and I've never made it before, I wanted to make sure I use what the recipe calls for.  Since I always buy self rising flour, I decided I would make my own baking powder for this cake recipe. Yep, you read that correctly! I made my own baking powder on Thursday; and it works! I made a test pan of biscuits using the homemade baking powder and they were beautiful. So beautiful they were eaten before I got a picture of them.


Baking powder consists of ingredients that are in most kitchens. ~


The good thing about making your own baking powder is you can make however much you need from several teaspoons to a cup. Of course, making your own means there's no aluminum that is in the store bought.

Baking Powder~

1 teaspoon baking soda
2 teaspoons cream of tartar
1 teaspoon cornstarch

For making a cup of baking powder:

1/4 cup baking soda
1/2 cup cream of tartar
1/4 cup cornstarch


Mix the ingredients well and use as your normal baking powder. Store in an airtight container.


Grant: Savior of the Union a Review


This post contains affiliate links.


When Ulysses S. Grant accepted the surrender of the Army of Northern Virginia at Appomattox Courthouse on April 9, 1865, he became the Savior of the Union. But he was more than just a general during the most controversial and costly time in American history.

One hundred and fifty years since the Civil War commenced, Ulysses S. Grant is still considered one of the greatest officers to wear the uniform of the United States Army. But he began his military career reluctantly.


After his father submitted an application to West Point for his son, Grant reluctantly attended. A few years after graduation he served in the Mexican War and distinguished himself in combat, but while he enjoyed the excitement of war, shortly after he married he became despondent at the amount of time his army life kept him away from his family and resigned. But when the country split apart in 1861 and war between the northern and southern states erupted, Grant was eager to wear a uniform again and serve his country.


Joining the Union Army meant more to Grant than becoming a soldier again. He fought because he believed it was his duty to do so. He firmly believed the war was fought over the issue of slavery, and so even after he was unable to secure a commission with the regular army he signed up with the Illinois volunteer army. Grant was a natural leader and rose quickly to Commander of the Union Army. He was a soldier’s soldier and the men who served under him respected his abilities to lead them in battle.


After the war, Grant went on to become the eighteenth president of the United States, serving two terms and presiding over the second half of Reconstruction, fighting for African American and Native American civil rights, and signing bills promoting black voting rights and Klan prosecution.


After years of resisting offers to write about his Civil War experience he suddenly found himself rushed to complete his memoirs when he was diagnosed with throat cancer. His two-volume memoirs were completed days before he died and were published posthumously in 1885. They are considered to be the greatest work of the genre and through them his military contributions remain with us always.


I would like to say, "I loved this book",  but I can't. I love American history and the Civil War is just one of my favorite parts of history I love to read about.  When I first started off reading this book, I was thrilled. Once I hit the battle front, I became lost. The writing began to wear me down. I was hoping for some excitement through those pages but I never really found any. If you're looking for a good reference biography book, you have a keeper. If you're looking for more excitement, this is not your book.
This book is excellent to have on hand as a resource for any history class. I'll definitely be keeping the book for future reference with my son.
~I was sent this book for free from BookSneeze for my honest opinion.~

A Snowy French and Indian War and My Wallet Is the Winner

It’s snowing today and I’m talking a little about local news and the French and Indian War.


I'm sitting here watching the snow falling and it's beautiful. All week the  local weather has talked about us getting between 6 and 12 inches of snow.  Because we have satellite TV, our "local" channels come out of Bismarck, North Dakota. The one channel that we watch gives the weather for our area. They are pretty good at the guessing game of weather. The market here is not like it is at home where they have all the latest radars and things; they are about 20 years behind with the instruments they use. When it comes to weather, I really miss Ken Cook from Atlanta.

I really didn't think anything about local channels except for the weather and some of the shows we watch like NCIS, Hawaii 5-0 and Shark Tank. Yeah, I know!  Of course, being an hour behind  Bismarck, the news is on at odd times. Those of you on the east coast and have wondered about the timing of TV shows... we watch them at the same time you do, only it's 2 hours earlier here. If I don't want miss a minute of NCIS, I have to make sure supper is cooked and everything cleaned up before 6:00, so I can watch it.
This was our second week back to school since the Christmas holiday. The school week seemed to fly by while the daily life week seemed to drag at a snail's pace. These two weeks we have been studying the French and Indian War. All I can say is "WOW", there is so much regarding this period in our country's history that I did not learn when I was in school. When I look back on my years in school and teaching school, I feel like I was deprived along with my students. The big Christian curriculum I grew up with and taught leaves so much out.  If your wondering what curriculum I am using, we are using All American History volume 1. I have my likes and dislikes about this curriculum and I plan on writing a review about it in the future.

I'm really proud of Jamie! We started Spelling Power in the fall and while I like it, he loathes it. The idea of  pulling out a spelling worksheet if he misses a word just crawls all over him. Well, this week he has not misspelled any of his group words. Last week we started something different; I'm allowing him to spell the word orally before he writes the word. If he spells it correctly, we move on. If not, he writes it out on notebook paper. Those words will then be written five times.  He likes this better; I guess because he hasn't missed any words yet.

If you've been reading my blog for any amount of time then you know, I am working to be self reliant when it comes to certain things. Over the past several years, I have started making my own laundry soap, vanilla,  and brown sugar.  Yesterday, I found myself with several hours of free time on my hands and I worked on three more items that I can make myself without having to spend extra money. You'll have to come back and visit to find out what those are, or better yet follow my blog.

Since I started out talking about the snow, here are a few pictures from Christmas Day.You should be able to click on it for a bigger view.


I'm a little surprised at how little snow we have so far. From the way people talk, we should already have at least three feet on the ground. If anyone out there is praying we don't get any major snow... just remember you are praying my husband doesn't get to work over time. We both would love over time!

How I Fry Chicken

I’m sharing a secret. My secret to how I fry chicken.


When my husband came home from work today, he asked me if I would write about how I fry chicken. Little did I know, he talks about my cooking all the time at work. He says it's because we are southern and the men know southern people can cook. Well, not everyone in the south can cook good. I've personally been on the receiving end of some of those southern cooks.

When it comes to fried chicken, I'm not like everyone else. I don't soak my chicken for hours on end in water or milk. In fact, the only thing I do different is, I pour Texas Pete hot sauce over the chicken after I prick it with a fork and let it sit for at least 30 minutes in the refrigerator.

I use to love watching Paula Deen when she first started out on television. You know, the years when she was in the country kitchen in the yellow house; to me those are her best shows. It was during those seasons, when I learned about using the hot sauce on the chicken. The only thing different, she adds the hot sauce in with her wet ingredients before coating the chicken in the flour. HERE is Paula's recipe.

 When I get ready to fry my chicken, most of the time I use my dutch oven. It has more room for the chicken to move around in while it is cooking. The dutch oven also is deep enough for the chicken to not just sit on the bottom and cook. If' you've ever fried chicken in a frying pan and you lost some of the crust when you turned it over, it's because it sat on the bottom and stuck to the pan. Want proof?  :)

Yep, those two pieces of chicken sat on the bottom and lost some of their crust. A sad day, I tell ya!

On Christmas Day, I fried the above chicken after we got back home from driving around and looking at the snow. I was a little short on time and I knew the dutch oven was going to be a deal to clean afterwards, so I just fried the chicken in a pan. I really should have use my cast iron pan, but I grabbed what I saw first and it was my stainless steel pan. Trust me, cast iron makes a difference in frying.

We like to taste the chicken not a lot of crusty, crunchy crust when we eat it. So I don't dip my chicken in an egg or milk mixture. I season it really well and I roll the pieces around in flour. I use self rising flour! If I don't have any self rising flour, then I add baking powder and baking soda to the flour just as if I was making biscuits. Before I even flour the chicken, the oil has to be ready for cooking. As soon as I flour a piece in the oil it goes.

One thing I make sure I do every time I fry chicken, is turn the heat down to medium. I honestly think chicken that is cooked at a lower heat for a longer time tastes better and it's juicier.


That picture is not the best! I'm embarrassed to even post it, but hot oil and a camera do not go hand in hand. We were amazed at the size of this package of chicken breast I bought. My husband posted a picture on Facebook after telling everyone about it.

The last thing I do with chicken is drain it. I place my colander in a bowl and line it with white paper towels, if I have them. If not, I use a tea towel that is used for draining. Many people talk about draining chicken on brown paper, but I've never tried it and have no plans on spending money on paper to drain chicken.

So, there you have it, my secret to frying chicken.

Chicken Stir Fry

Homemade Chicken Stir Fry is quicker and easier than you think.


Living where we do, we have come to expect higher prices on food. Our town has nothing to offer, so we have to drive to Baker or wait until our bi-weekly trip to Miles City. Baker doesn't have much to offer other than bar room food which we will not buy and a  diner and sandwich shop, but they do have a pretty good Chinese restaurant if you're willing to pay the price. After our last trip in November, I refuse to spend any more money there! We spent $40 on three entrees with spring rolls and drinks. You don't want to drink the local water in this area, so you don't order it. :)  I can make the entrees that we like to eat cheaper than $21.00. As for the spring rolls, I'm working on that one.

Chinese food is probably one of the favorite cuisines that we like to eat often. So when I decided to cook a stir fry, I knew I was going to have to go with frozen vegetables since they are a lot cheaper than fresh at the moment. Yeah, I know.  Rice is an inexpensive side dish and you can serve more of it with the meat and vegetables to help with budget costs. And I can't leave out my new Soy Sauce Substitute I made.

Chicken Stir Fry


2 cups rice
3 cups water 
2/3 cup soy sauce substitute
1/4 cup brown sugar
1 TBSP cornstarch
1 TBSP minced garlic
1/4 tsp red pepper flakes
1 package boneless chicken breast or tenderloins, sliced
2 TBSP oil
1 green bell pepper, julienned
1 onion, julienned
1 bag frozen stir fry vegetables

Bring water to a boil in a saucepan over high heat and add rice.  Reduce heat to low, cover, and simmer until rice is tender, and liquid has been absorbed, 20 to 25 minutes.

Combine soy sauce substitute, brown sugar, and corn starch in a small bowl; stir until smooth. Mix garlic, and red pepper into sauce; coat chicken with marinade and refrigerate for at least 15 minutes.

Heat 1 tablespoon of oil in a large skillet over medium-high heat. Cook bell pepper, onion, and vegetables until just tender, about 5 minutes. Remove vegetables from skillet and keep warm.

Remove chicken from marinade, reserving liquid. Heat 1 tablespoon oil in skillet over medium-high heat. Cook chicken about 2 minutes per side; return vegetables and reserved marinade to skillet. Bring to a boil; cook and stir until chicken is longer pink in the middle and vegetables are tender, 5 to 7 minutes. Serve over rice.

**When I cook rice, I use 1 and 1/2 cups of water per cup of  rice.