Back to the Basics with Bread

The greener grass on the other side of the fence is not always as green! I went back to the basics on making homemade bread that would last longer than a day before turning hard.


For the past couple of months, I have been trying to find the P-E-R-F-E-C-T sandwich bread recipe. With the rising cost of food in this neck of the woods, bread was on the list to be removed from my shopping list. Store bought bread in general for our family includes loaf bread and hamburger and hotdog buns and I was spending $15.00 every two weeks on bread. Gut wrenching, I know!

Anytime, I mention making homemade bread, experienced bread bakers always suggest King Arthur Flour's website. There are literally over 700 recipes just for bread listed on their website. I have tried several of the recipes over the past few weeks and just could not get over how fast they hardened. Reading over the reviews for each recipe, I could not find anything to help me out.

So...

Something hit me while reading one night last week, I have several recipes that I used when I was first learning to bake bread and loved them. After using them for awhile, I began thinking I needed a better recipe. So I veered away from them and began looking for greener grass on the other side of the fence. After gazing at those greener pastures, I gave up baking bread because I was just not happy with the product.

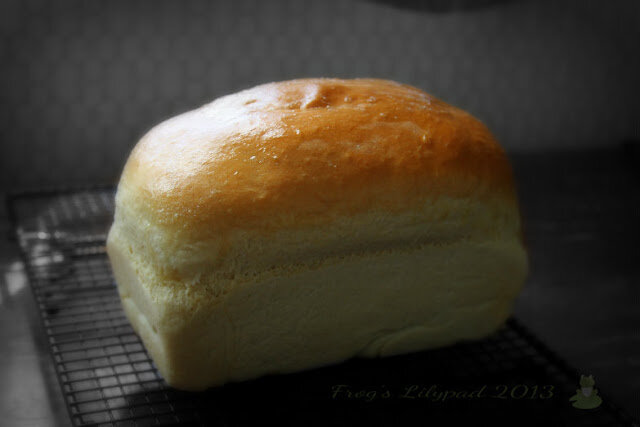
Last Thursday, I baked a loaf of THIS bread with a couple of modifications. Would you believe the last 1/4 portion of the loaf is still soft? It's 7:30 on Sunday evening and that bread is still soft like store bought bread? This time last week, I was waiting on a loaf of bread to proof so my husband would have soft bread for his lunch on Monday morning. Tonight, I'm writing this blog post telling you that "the greener grass on the other side of the fence" is not always as green!

Back to the basics! I have quickly learned going back to the basics for our bread is just what I needed to do along with a few modifications.  The original recipe called for sugar and oil, this time I used honey and butter.

Basic Homemade Bread


2 cups warm water
2 TBSP honey
1 ½ TBSP active dry yeast
1 ½ tsp salt
¼ cup butter
6 cups flour

In mixing bowl add water, honey and yeast; let proof 5 minutes. Next add flour, butter (soften the butter until it is a thick consistency, not a liquid) and salt. Turn on mixer and mix until a ball forms and then turn up on medium and knead between  5- 8 minutes. Remove the dough hook and cover with plastic wrap and allow to rise until dough has doubled, about an hour.

Remove dough and form into two loaves and let rest for about 5 minutes. Place in  greased loaf pans and cover with plastic wrap and let rise for 1 hour. Preheat the oven to 350 degrees when the dough has about 15 minutes left in the second rising.

Place the pans in the oven and bake for 30 minutes.  If your bread turns really brown towards the end of the baking process, make an aluminum foil tent and place over the bread to keep from becoming too dark. Cool on a cooling rack and cool completely before storing to keep the bread from molding.

*** This is an easy recipe to cut in half to make only one loaf.***

I know many people look down on white bread and that's okay. My husband usually goes along with me when it comes to healthy eating, but he'd rather give up bacon than his white bread. :)  As long as he is happy, I am happy!

A Week with the Presidents

We’re studying the presidents this week. We quickly learned reports about these men at that time were false. Bad reporting was going on even then.


What a week! It's a little disturbing to realize it is already the 5th day of April, time seems to be slipping by rather quickly for me.  Thankfully, it is Friday because our Friday's are more laid back and we spend the day finishing up on lessons that may not be 100% completed and we do more reading .

We began studying the Presidents in AAH two weeks ago and this week we’ve been studying  John Quincy Adams through James Polk. It’s quite interesting to read about the early lives of these men.  During our study of William Henry Harrison, we found it rather interesting how the Whig party portrayed him to be a simple frontier Indian fighter drinking cider and living in a cabin, when in reality he was born into Virginia aristocracy.  Funny how “not telling the whole truth” in American politics has been around for many, many years.

In our science, we have been studying Geology this week.  I've been using a lot of videos and photos I came across from HERE to help me in learning to like science and hopefully create a love for it in Jamie. Marty has some amazing stuff listed for upper Apologia sciences and her Youtube channel is wonderful!

This time next week, Jamie will be in bullriding school. This is something that we've been wanting to do for a couple of years, and now have the chance. My husband and I are really excited about this opportunity because he will be learning from one of the best, former World Champion Cody Custer. As a Christian mom, I'm excited about this because of the Christian testimony Cody has and I'm not going to have to worry about dirty words slipping from his mouth when he talks with and around my son.

We've been enjoying spring like weather for almost two weeks. The temperature has been close to 70 until yesterday when it cooled off some. Today there is a chance of rain with temperatures in the 60's. We are keeping our fingers crossed for the rain.  :)

We've been enjoying some new recipes over the last week. I shared the Barbequed Beans and Sausage yesterday and I have several more to write up and share. Hopefully, I'll be able to get them up within the next few days.

Tomorrow's the day... my grocery shopping trip to Miles City. Hopefully, I'll be able to swing by the thrift store, since they were closed the last Saturday we were in town.

Sharing a verse today that I have to remind myself of some mornings.

Barbecued Beans and Sausage

Did you grow up eating Pork and Beans? Yeah, me too. I loved them. While this recipe may bring back memories, it is definitely not like those little cans of cold beans and fatty pork.


I stumbled across this recipe over at Cinnamon's blog. She has the most beautiful family you just have to see to believe; make sure you visit.  Anyway, after clicking on a couple of links I ended up at the original recipe. Boy, I'm glad I clicked away that day, because this recipe is super yummy.

Wouldn't you know when I try a recipe that we are going to L-O-V-E, I make the original servings! Yep, I should have doubled the recipe because it is so good.  As I was clicking that day, I read this was a grown up version of the childhood favorite ~ Beanie Weenies.  Let me tell you, these are mind blowing good! Way better than Beanie Weenies ever thought about being.

I did make a couple of changes like, leaving out the Worchester Sauce, using regular yellow mustard and adding a little water for sauce.


BBQ Beans and Sausage

2 cans Great Northern beans, drained, rinsed
2 cans Black beans, drained, rinsed
1 large onion, chopped 
1 cup barbecue sauce
1/4 cup packed brown sugar
1 TBSP mustard
2 tsp chili powder
1 package polish sausage (I use turkey)
1 cup water

Mix all the ingredients except for the sausage in a slow cooker. Slice the sausage and place on top of the bean mixture and cook on low for 3-4 hours.

If you noticed in the picture, I cut my sausage in different sizes. Half the sausage, I slice in half long ways and then slice those two pieces up. The other half, I slice in rings. Just a little difference with each fork full.

Teaching History

History is a bore for many. When teaching it, you should show a love for things of the past.

When I was growing up, I seriously hated history. I learned the dates and names of people, places and wars just so I could make a good grade on tests and quizzes, but I never learned history. It was not until I was in the 10th grade when I was introduced to the world of World History by an amazing teacher. I remember the excitement about anything she taught and how she showed the class learning can be fun.


After being in the same Christian school since kindergarten and never seeing that kind of excitement, I did not know how I was going to get over the initial shock of someone who really cared about what they taught. It didn't take long!

Fast forward twelve years ~ I was sitting in a workshop at the regional Christian School Teacher’s Convention. The speaker was Carolyn Hobbs better known as “Aunt Carolyn”. The workshop was entitled something along the lines as “How to Tell a Story and Keep Your Listeners”. In this workshop she told as a teacher, it is our responsibility to make a child want to learn. She went on and explained if you can tell a story, you can teach history. As Mrs. Hobbs spoke she explained, instead of reading word for word the textbook, study the information and bring to life and let the students see history as a story. I’ll never forget how she brought her story That Dog Spot to life in that auditorium. I was on the edge of my seat; I wanted to teach history like that. I wanted my students to be hanging on to my every word when it came to history.

Over the years, I was encouraged and discouraged by the administration in two schools when it came to this kind of teaching. While one leadership loved it and wanted the children to learn, the other disliked it and wanted the textbook read.

When I filled in as a 7th and 8th grade World History teacher a couple of years ago, I brought that kind of teaching to class. I remember a little fellow came up to me after class and said, “I don't like history, because we've always had to read the book. I can't believe how you teach it; I think I'm going to love it. I’ve never had a teacher be so excited about history.” That statement, I believe will stay with me for many years. When the new teacher came in and observed the class schedule, I was questioned why I didn’t read or have the students read word for word the textbook. I simply told her, history needs to be taught where children will want to learn it.

Here are a few things to consider when teaching History~

1. Know the subject: Don’t try to teach by the seat of your pants. It doesn't work; I’ll admit I have tried it and failed horribly. You have to have knowledge of what you are presenting; take the time to read up on the subject.

2. Don’t sugar coat history: Depending on the age, children need to know the good, the bad, and the ugly of history. The good thing about home education, a parent can build on what has been taught in the past years. Once a child is old enough/ mature enough to handle more of the truth, teach it.

3. History, History, History: History is about the past and if we are not reminded of it, then many of us may end up repeating it. Don’t water it down by mixing it with geography, economics, civics, and etc. Those are all good and need to be taught, but don’t leave out the history.

4. Textbooks vs. Living Books: This is where many will pause and scratch their heads. If you are like me and like the textbook route; don’t let it dictate what you teach. All history textbooks don’t cover everything; use the textbook as a spine and include more living books. Allow your children to spend time enjoying history.

5. Make it hands on: We learn with our eyes, ears, mouth and hands. Drilling over facts is good but let children run their finger along the river or mountain range on a map. Have them explore the shape of the continents, countries and states, show pictures of historical men, women and places. Bring this information to life.

6. Field trips: If you live near a historical site, visit it. Bring that area to life to your children by allowing them to see where Abraham Lincoln was shot, or where George Washington lived. Don’t forget about local history. Many people live near battlefields that may not be quite as famous as Gettysburg or Little Big Horn; visit them and learn what you can about the battle. You may live near local historical monuments or plantations, local history is just as important as national history.

Don't let the drudgery of our past history class be passed along to our children. Let them see history is fun and exciting!
Let him, on the contrary, linger pleasantly over the history of a single man, a short period, until he thinks the thoughts of that man, is at home in the ways of that period. Though he is reading and thinking of the lifetime of a single man, he is really getting intimately acquainted with the history of a whole nation for a whole age. ~ Charlotte Mason

ScriptureTyper a Review

To help with Bible memorization. We use ScriptureTyper.


We've been using THIS method of Bible verse memorization for a good while now and love it. It's easy to use without spending a lot of time memorizing.  To take it up a notch, I found ScriptureTyper several months ago and have thoroughly enjoyed using their system.


ScriptureTyper accelerates memorization by utilizing both visual AND kinesthetic memory.

Tap into your kinesthetic memory which combines your sense of touch and your innate ability to remember patterns and feelings.


Combine touch typing with Bible memory and feel the patterns of the scripture as you type them so that you memorize faster, increase retention, and enhance your capacity to memorize verses.

This wonderful website, has two options you can use ~ their collections (over 60) of verses or you can add your own verse. There are several versions of the Bible in the system, so you can choose which is best for you. You'll find these under your profile settings.

A really neat thing about ScriptureTyper, they keep up with your words per minute when you type. This is a neat function that would be great for beginner typists. Instead of buying a program for typing, Bible verses are amazing to learn to type to.  I use it with Jamie and he can see his wpm when he is finished typing.

If typing is not your thing, then you have an option to printing off verse cards to use in memorization.

With ST, you can join groups or start a group for your church or community. There are quite a few across the country and even in a few other countries.

When it comes to memorizing Bible verses, I work to memorize them, so they will stay with me. I'm not competitive, nor do I really care what others are doing when it comes to memorizing the Bible. But if you are one who likes this sort of thing, then you'll be happy to know when you master a verse you are given points. Those points will rank you among the other users.

ScriptureTyper has several videos on how to get started with their site, but truthfully, it so easy you may not even need them.There is even an app for the iphone and is working on one for the android. They are hoping to release the android app before the end of the year.

The best part about ScriptureTyper, it is a free service.

** I did not receive anything for this review. ScriptureTyper is a service I have found useful in our home and wanted to share it with you all.**

Happy Resurrection Day

We serve a Risen Saviour!


In the end of the sabbath, as it began to dawn toward the first day of the week, came Mary Magdalene and the other Mary to see the sepulchre.
And, behold, there was a great earthquake: for the angel of the Lord descended from heaven, and came and rolled back the stone from the door, and sat upon it.
His countenance was like lightning, and his raiment white as snow:
And for fear of him the keepers did shake, and became as dead men.
And the angel answered and said unto the women, Fear not ye: for I know that ye seek Jesus, which was crucified.
He is not here: for he is risen, as he said. Come, see the place where the Lord lay.

Matthew 28:1-6


I am so thankful, I worship a living Saviour.

All American History

I'm not sure how much my love for HISTORY shows, but I have an abundance of love for the subject. Whether it is Biblical, World, United States or even Family history, there is always something you can learn from it. We all know the statement about history repeating itself and some of us have seen it happen in our lifetime while many of us have read about it in the history books. Studying history is a necessity.

This post contains affiliate links.


Last summer when I was deciding on a history curriculum for this year, I knew I wanted to do a year long American history study. There are several Christian based home school curricula on the market and after I read review on top of review, I decided on All American History. With AAH, you have two volumes; perfect for two years and depending on how you use the books, maybe more. During our homeschooling years, we used both volumes.

Volume 1 The Explorers to the Jacksonians.


Volume 2 The Civil War to the 21st Centrury


There are three books that make up All American History for each volume. 

1. The Teacher's Guide ~ In this book you will find everything you need to make this a fun study. Activities based on what is being studied, games, answer keys, master copies of images and the student worksheets, and of course the book lists. These lists has been more valuable than gold to me this year. Because of these lists, we have been able to read some amazing books we probably would have missed without the lists. For each lesson you will also find  some incredible information on certain subjects that is a little more detailed than in the reader. 

2. The Student Reader ~  The book is not written like many history books ~ facts on top of facts needing to be memorized. The book is more like a story book; and that's a good thing.

There are 32 weeks of lessons in the book with some lessons being a little longer than others; those lessons can be studied longer than a week. This is something that we have done this year. Each lesson is broken down into three sections: the atmosphere, which is the setting of the events that took place; the event, the when, where and how that took place; the impact, a short run-down of major happenings in the chapter.

Within the first two weeks, I realized there was a good bit of bouncing around through the atmosphere and event sections. Because of this there was some confusion with the explorers in those chapters. I did a little more planning to keep this from happening throughout the year by using sticky note flags in these sections to be able  to read only the atmosphere and impact of the one person/place at a time.  Clear as mud?  :)

3. The Student Workbook ~ It's a must! In this consumable book you will find notebooking style worksheets, review pages ( I used these as quizzes) maps, photos of historical people, and flags. There are also some additional, optional worksheets for students to use to help further their studies.  I had my binding cut and placed the book in a three ring binder for easy removal.

As I mentioned earlier, the bouncing around and confusion in the atmosphere and event sections; that is the only thing I disliked about the reader but it can be easily remedied if you plan ahead.  I love, love, love this curriculum; it is a fantastic, in depth study and put together set of books.  You have everything you need at your finger tips.  I can't wait for the fall so we can begin working on Volume 2.

For the younger lovers of history there is an All American History, Junior. From what I've read it is not quite as detailed as the regular volumes.

Davy Crockett Bars

I stumbled across this recipe, while I was searching for a cookie bar recipe. I made several changes to it and it turned out wonderful. So what is a Davy Crockett Bar?


It's very much like a blondie/brownie but with oats. So yummy! The changes I made were with the oil and the baking time. The original recipe called for a whole cup of oil. I could not get over that thought, so I cut it way down and added the applesauce. You could also remove the oil altogether and just use the applesauce. Much healthier! Another thing I had to do was watch the baking time.The original recipe called for 15 minutes. I used a 10X13 pan (I'm thinking they used a bigger pan.)  I started the timer for 15 minutes and added 5 minutes and then another 4 minutes for a total baking time of 24 minutes. A bigger pan might not be a bad idea.


Davy Crockett Bars

1 cup granulated sugar
1 cup brown sugar
2 eggs
2 cups flour
2 cups oats
1 cup chocolate chips
1/4 cup oil
UP TO 1/2 cup applesauce
1 tsp. vanilla

Preheat oven to 350 degrees. Butter a jelly roll pan.

Mix together sugar and eggs, add flour, oats, chocolate chips combine until mixed well. Add oil and then applesauce. ** You may NOT need all the applesauce. You want your dough to be wet enough to spread easily without being too soggy. You want the dough to look like oatmeal. Add the vanilla.

Spread mixture into the prepared pan and bake. Depending on your oven and the pan size, start your timer off with 15 minutes and go from there. ** Write down the total amount of time it took, so you'll have it for future reference.

This is one of those recipes, that you can make all your own, by adding dried fruits and nuts.