
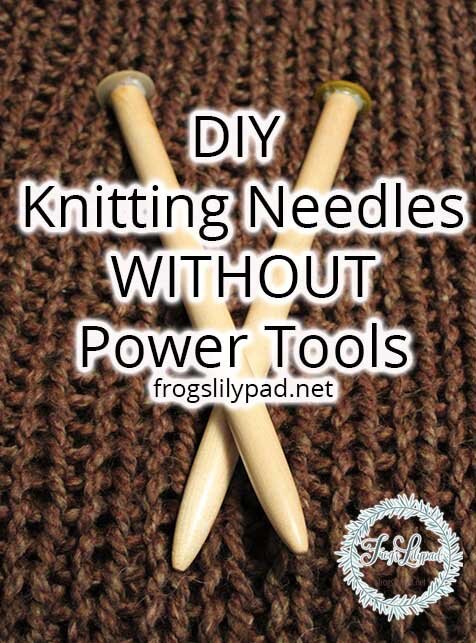
DIY Knitting Needles WITHOUT Power Tools
/
Last year, my husband made me a set of knitting needles. I was amazed at the cost of large plastic needles when I prepared to make an afghan. We were still living in the middle of nowhere Montana, and the local Walmart didn’t carry the size I wanted. And I was too far away for a quick drive to the nearest yarn store. After comparing prices, I knew I was not paying $20-25 for plastic needles. My only option was to make them. So that is what I did!
**Before I even began with what I bought and how I made them, I need to make this announcement. I would never do this for smaller needles for clothing. The least little difference causes problems with the finished item not being the correct size.
Another service announcement: You can make these with power tools much quicker, but if you don't have access to tools like a belt/hand sander, give this a try. This method takes time. - Just a warning for you.
Needed items: hand saw (we used a coping saw), dowel rod, sandpaper (80,150,220,and 400 grit), something to put on the end of the needles (large buttons), and spray clear coat (optional).
For the first pair of needles, I bought a ¾ inch dowel rod because it was the closest to a size 50 needle without being to hard too work with. I already had the sandpaper, the buttons, the hot glue, and the clear coat spray. So, I only spent $3.00 on them.
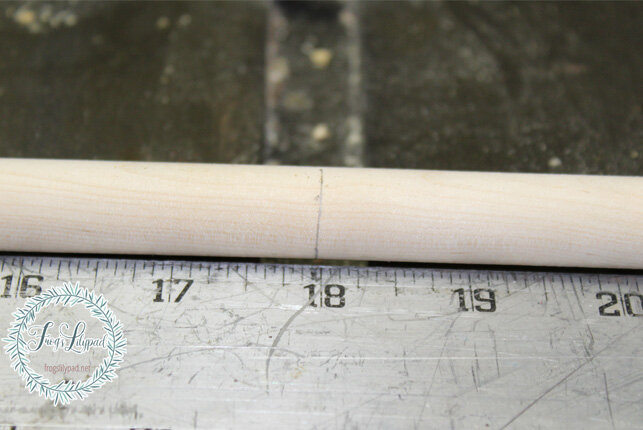
DETERMINE THE LENGTH. On the first pair, I measured the rod at 13 inches. I wish I would have cut them longer because I had to squish the yarn on the needles while knitting the last little bit of stitches. It’s better for the needles to be a little too long than not long enough and risk the end piece coming off along with all your stitches. I worked on a new pair of needles for a different size afghan, so I had them cut to 18 inches. If I remember, the rod in the picture is ½ inch.
Once the point is formed, you can do two things. You can cut/whittle down the point to save time, or use the 80 grit sandpaper and sand the point down. Whittling keeps your hand from cramping, but if you are not comfortable with “shaving” down the wood, then using the sandpaper is the best way to go. (Just remember, it will take time.)
When you have your point made, switch to the 150 grit sand paper and smooth it and the needle. Change to the 220 grit paper and sand. For the finishing smoothness, switch to the 400 grit.
If you choose to use a spray clear coat, now is the time to use it. Be sure to let each coat thoroughly dry before adding another. The first set of needles I used it, but the second set, I did not. So far, I haven’t had any problems with them.
Now, put them to use and knit something beautiful.
Don’t waste your time searching for large needles. Don’t waste $20 or more for a pair to only knit large projects.
DIY KNITTING NEEDLES
**Before I even began with what I bought and how I made them, I need to make this announcement. I would never do this for smaller needles for clothing. The least little difference causes problems with the finished item not being the correct size.
Another service announcement: You can make these with power tools much quicker, but if you don't have access to tools like a belt/hand sander, give this a try. This method takes time. - Just a warning for you.
Needed items: hand saw (we used a coping saw), dowel rod, sandpaper (80,150,220,and 400 grit), something to put on the end of the needles (large buttons), and spray clear coat (optional).
For the first pair of needles, I bought a ¾ inch dowel rod because it was the closest to a size 50 needle without being to hard too work with. I already had the sandpaper, the buttons, the hot glue, and the clear coat spray. So, I only spent $3.00 on them.
DETERMINE THE LENGTH. On the first pair, I measured the rod at 13 inches. I wish I would have cut them longer because I had to squish the yarn on the needles while knitting the last little bit of stitches. It’s better for the needles to be a little too long than not long enough and risk the end piece coming off along with all your stitches. I worked on a new pair of needles for a different size afghan, so I had them cut to 18 inches. If I remember, the rod in the picture is ½ inch.
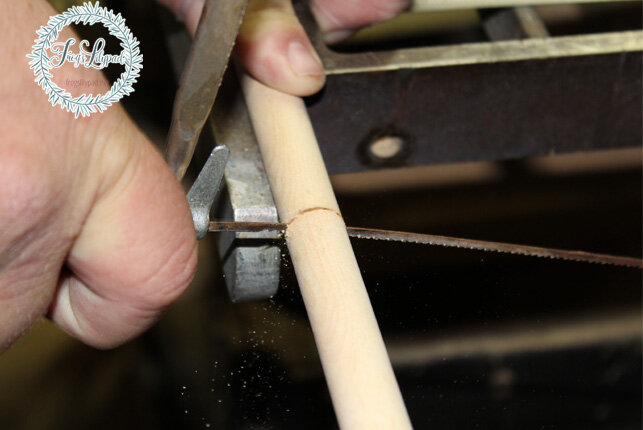
Cut the rod to desired length.
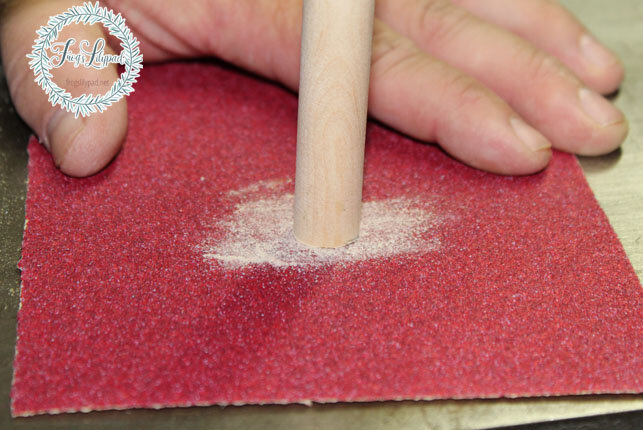
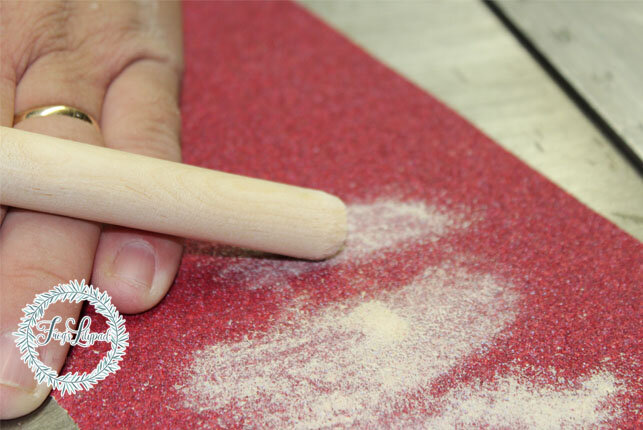
Sand down the rough ends using the 80 grit paper.
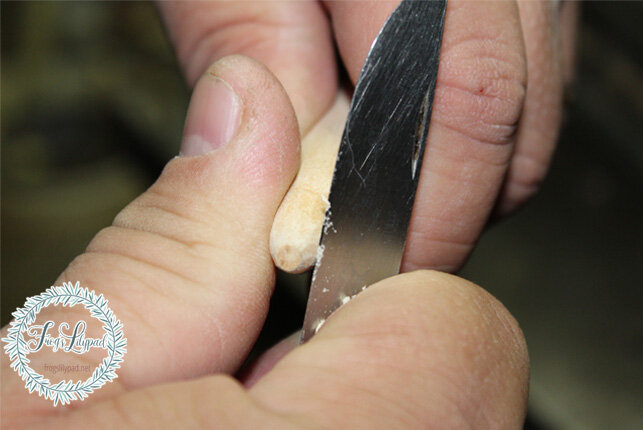
The next step, form the point. My husband held the rod at an angle to start the formation.
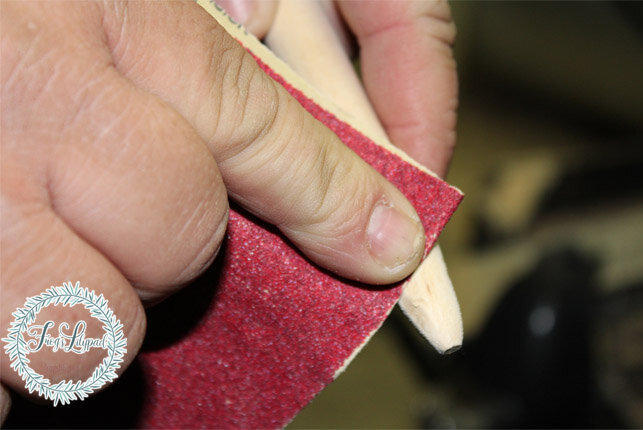
Once the point is formed, you can do two things. You can cut/whittle down the point to save time, or use the 80 grit sandpaper and sand the point down. Whittling keeps your hand from cramping, but if you are not comfortable with “shaving” down the wood, then using the sandpaper is the best way to go. (Just remember, it will take time.)
When you have your point made, switch to the 150 grit sand paper and smooth it and the needle. Change to the 220 grit paper and sand. For the finishing smoothness, switch to the 400 grit.
If you choose to use a spray clear coat, now is the time to use it. Be sure to let each coat thoroughly dry before adding another. The first set of needles I used it, but the second set, I did not. So far, I haven’t had any problems with them.
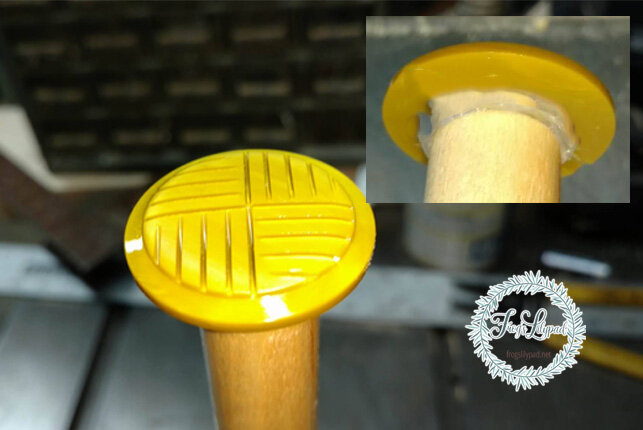
Attach whatever you are using as the end stop of the needle.
Now, put them to use and knit something beautiful.
Don’t waste your time searching for large needles. Don’t waste $20 or more for a pair to only knit large projects.
Save Your Money, Make Your Own, and Work a Little Effort into a Pair – You’ll be glad you did!
Have you made your own knitting needles or something else similar to keep from spending a bunch of money?